

Alright, you've just walked out of your microneedling session in Los Angeles, and you're probably wondering, "Now what?" The next few days are just as important as the treatment itself. Your immediate goal is simple: keep your skin calm, clean, and hydrated.
You're going to see some redness and maybe a bit of mild swelling for the first 24 to 72 hours. Don't panic! This is actually a great sign. It means your body's natural healing and collagen-building processes are kicking into high gear.
Your Immediate Post-Microneedling Recovery Plan
Think of the first three days as a critical healing window. Your skin is wide open—in a good way. It's incredibly receptive to nourishing ingredients but also very vulnerable to irritants. What you do right now directly impacts your final results, setting the stage for that smooth, glowing skin you're after.
This is definitely not the time for your usual 10-step routine filled with potent actives. Instead, we're shifting gears to create a simple, soothing, and protective environment for your skin to work its magic.
This handy visual breaks down the core of what you should be doing right after your treatment.
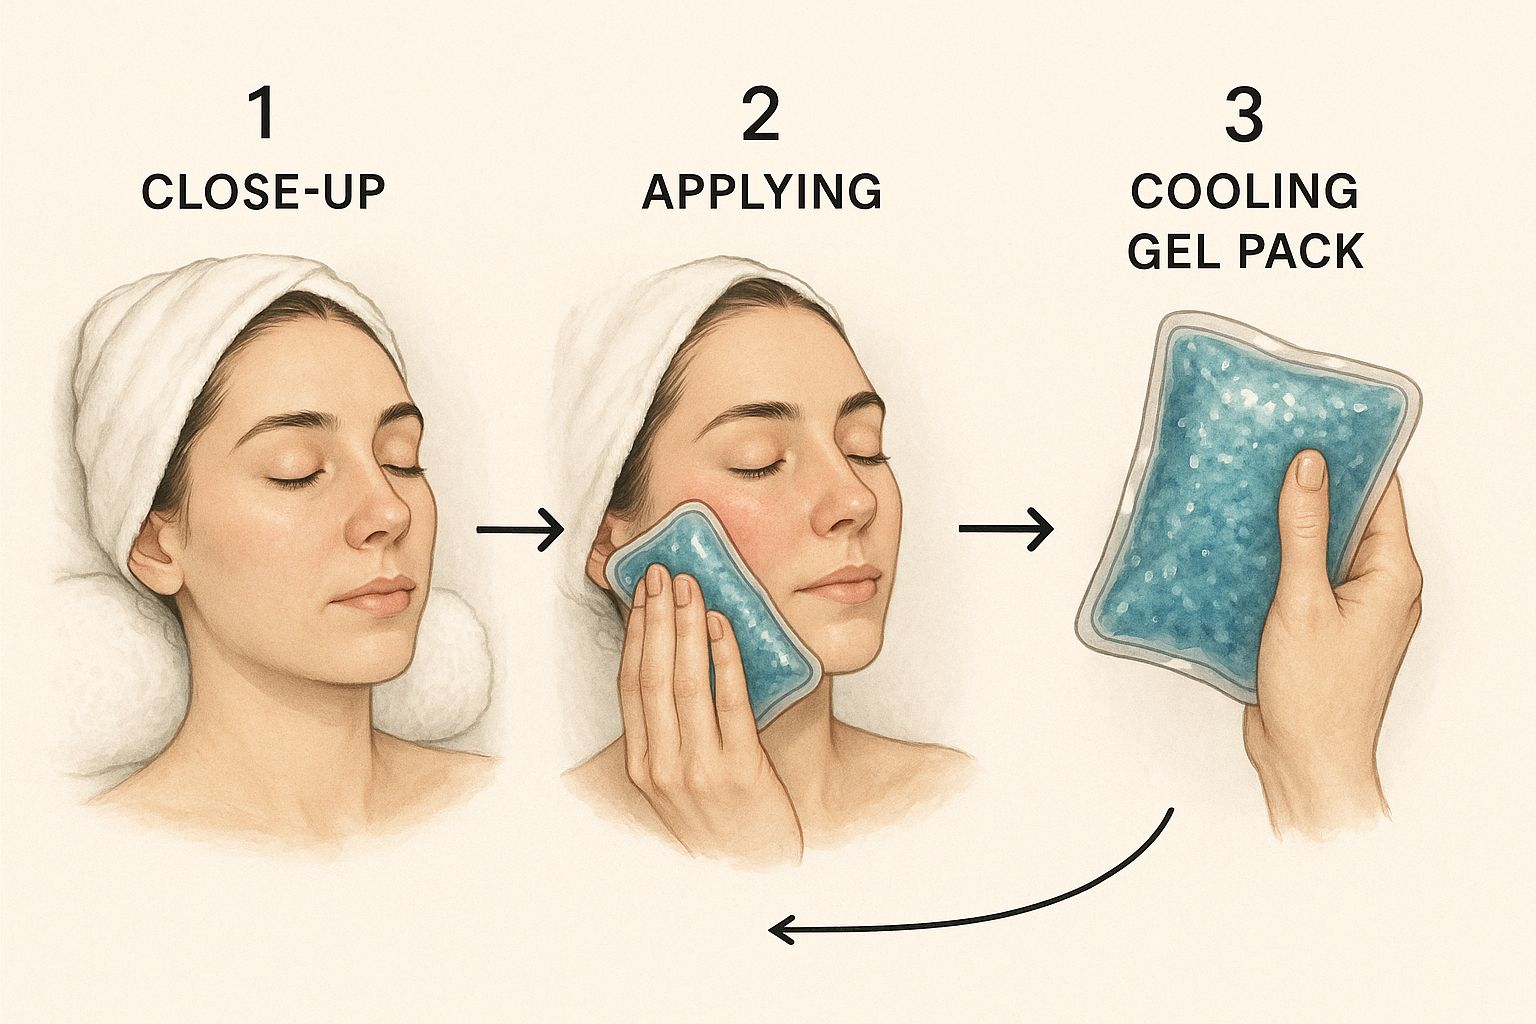
As you can see, gentle care is the name of the game. A cool compress can feel amazing and really helps take the edge off that initial "sunburn" feeling.
The First 72 Hours: A Quick Guide
To make this super simple, I've put together a timeline of what to do (and what to avoid) during this crucial healing phase. This is your go-to cheat sheet for the first three days.
The First 72 Hours Aftercare Timeline
| Timeframe | What to Do | What to Avoid |
|---|---|---|
| First 24 Hours | Keep skin clean and dry. Use only products recommended by your provider. Gently apply a hyaluronic acid serum for hydration. | Makeup, sun exposure, sweating (no gym!), harsh cleansers, exfoliants, touching your face with unwashed hands. |
| Day 2 (24-48 Hours) | Cleanse with a gentle, non-foaming cleanser and lukewarm water. Reapply hyaluronic acid and a simple, nourishing moisturizer. Start using a mineral-based SPF 30+. | Active ingredients (retinoids, vitamin C, acids), hot showers or saunas, swimming pools, picking or scrubbing the skin. |
| Day 3 (48-72 Hours) | Continue with your gentle cleansing and moisturizing routine. Be diligent with your SPF. Skin may feel dry or start to flake—this is normal. | Still avoid all exfoliants and active ingredients. Don't peel or pick at any flaking skin. Let it shed naturally. |
Following this simple plan helps prevent complications and ensures your skin has everything it needs to heal beautifully.
Key Priorities for Healing Skin
During these initial days, your skincare philosophy should be "less is more." Focus on these core principles:
- Hydration is everything. Your skin's permeability is temporarily increased, meaning it can drink up gentle, beneficial ingredients like a sponge.
- Protection is non-negotiable. Keep your healing skin away from the sun and harsh products. No exceptions.
- Patience is a virtue. That initial redness and "tight" feeling are temporary and usually fade within 3 to 5 days.
I've seen it time and again in my practice: proper aftercare is what separates good results from great results. Clinical studies back this up, showing that the right post-treatment care doesn't just prevent issues—it actively enhances the outcome. Using specific serums with ingredients like growth factors can speed up healing and give your collagen production an extra boost for even better texture and firmness.
By taking a minimalist and gentle approach, you're giving your skin the perfect canvas to repair itself effectively. For a deeper dive, our partners at MDpen.co also have some fantastic insights on maximizing your results.
How to Gently Cleanse and Hydrate Healing Skin
For the first few days, you need to treat your skin like delicate fabric. That means your go-to foaming cleanser has to take a temporary backseat. Those satisfying suds often come from stripping agents that are far too harsh for skin in full-on repair mode.
Instead, reach for a milky or cream-based cleanser. These formulas are designed to clean your skin without compromising its moisture barrier, which is working overtime to heal those micro-injuries. When you wash your face, use only your fingertips and lukewarm water. Steer clear of hot water, as it can dial up the inflammation and redness you're trying to calm down.
After cleansing, gently pat your face dry with a clean, soft towel. No rubbing! This simple change in technique makes a massive difference, preventing friction and irritation on your already sensitive skin.
The Power of Post-Treatment Hydration
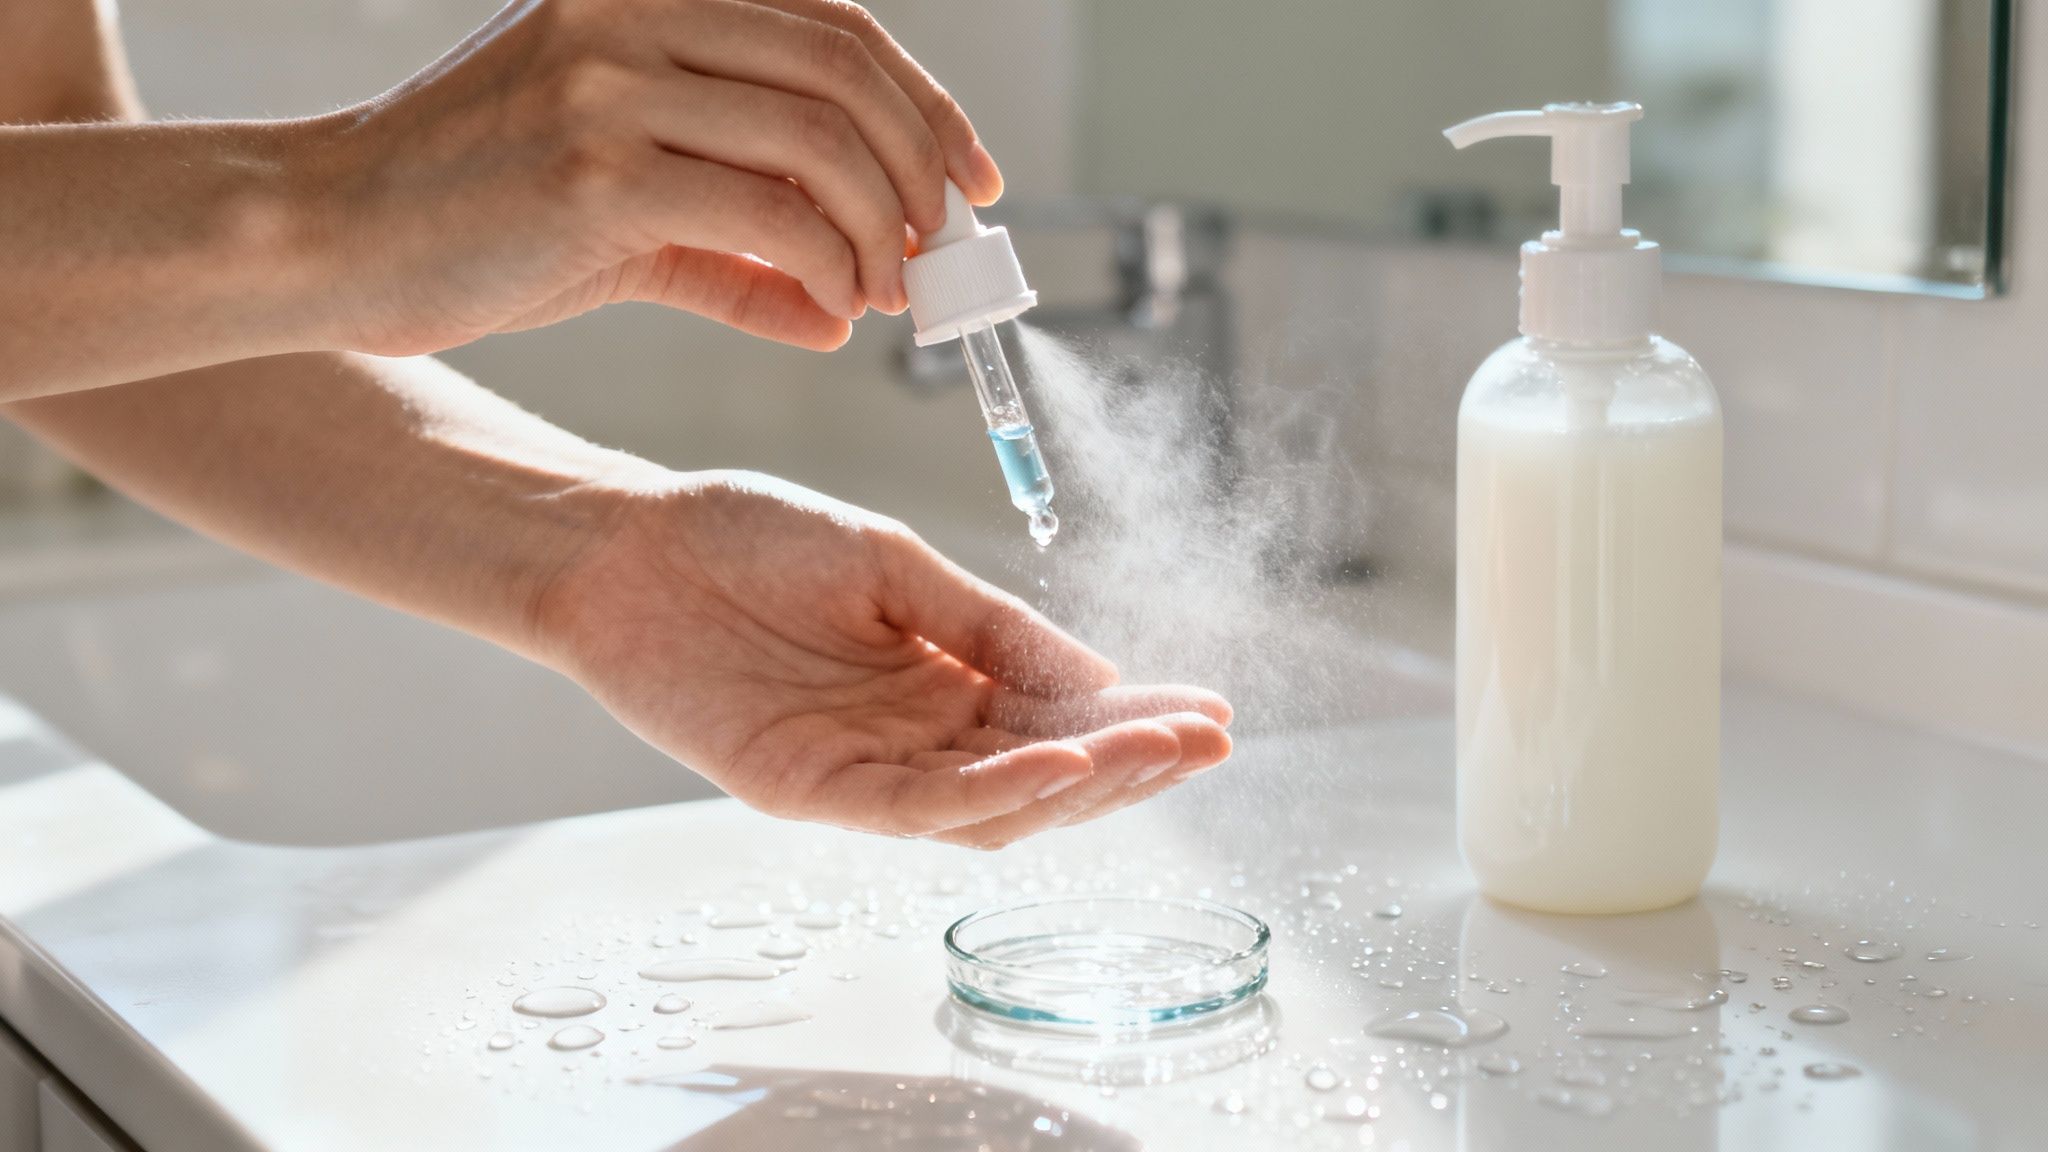
With your skin clean and prepped, hydration is your top priority. After a microneedling session, your skin is incredibly receptive, almost like a sponge. The right hydrating serum won't just feel good—it can genuinely speed up the healing process. This is where hyaluronic acid becomes your hero product.
Hyaluronic acid is a master of moisture, famous for its ability to hold up to 1,000 times its weight in water. When you apply a pure hyaluronic acid serum to slightly damp skin, it pulls that moisture deep into the dermal layers. This plumps the skin from the inside out and provides immediate relief from that tight, post-procedure feeling.
Think of it like this: the treatment created tiny channels in your skin, and now they are wide open, ready to soak up whatever you give them. Flooding them with hydration creates the perfect environment for your cells to repair themselves and kickstart new collagen production.
Applying Serums for Maximum Benefit
How you apply your serum matters just as much as what's in it. Put a few drops onto your clean fingertips and gently press or pat the product into your skin. Let go of any instinct to rub it in vigorously.
Proper hydration is non-negotiable after microneedling. It not only soothes the immediate redness and sensitivity but also provides the foundational support your skin needs to rebuild stronger. Well-hydrated skin is healthy skin, and that’s precisely what we’re aiming for.
A simple, highly effective routine looks something like this:
- Cleanse: With a gentle, non-foaming cleanser and lukewarm water.
- Pat Dry: Use a soft, clean towel and a light touch.
- Hydrate: While your skin is still a little damp, press in a hyaluronic acid serum.
- Moisturize: Seal everything in with a basic, barrier-repairing moisturizer.
This focused approach is a critical piece of the puzzle for what to do after microneedling. It supports your skin’s natural healing, minimizes discomfort, and helps you achieve those glowing, long-lasting results. By keeping your routine gentle and supportive, you're giving your skin exactly what it needs to heal beautifully.
Choosing the Right Skincare Products Post-Treatment
Think of your skin right after a microneedling session: it’s covered in tiny, open microchannels. This makes it incredibly absorbent, like a sponge, but also extremely sensitive. What you put on it during this time is more critical than ever.
This is not the moment to experiment or slather on your most potent anti-aging serums. Instead, it’s all about a stripped-back, supportive routine focused purely on healing.
Ingredients to Avoid for the First Week
Some of your daily skincare heroes need to take a temporary vacation. Using them on freshly treated skin can backfire, causing serious irritation and slowing down your recovery. You’ll want to press pause on these for at least a week.
- Retinoids (Retinol, Tretinoin): These are powerhouse ingredients for cell turnover, but that’s exactly what you don't want right now. Your skin is already in a hyper-reparative state, and adding a retinoid on top is just asking for intense redness, peeling, and sensitivity.
- Vitamin C Serums: I’m a huge advocate for vitamin C, but most formulas, especially those with L-ascorbic acid, are highly acidic. Applying one to compromised skin will likely sting and cause inflammation. You can read all about the benefits of Vitamin C later, but for now, keep it on the shelf.
- Exfoliating Acids (AHAs/BHAs): Glycolic, lactic, and salicylic acids are designed to exfoliate. Putting them on skin with thousands of micro-injuries is a recipe for disaster. It will disrupt the delicate healing process and could even trigger post-inflammatory hyperpigmentation.
It might feel strange to step away from your heavy-hitting products, but trust me, this is a non-negotiable part of good aftercare. Your skin craves simplicity right now. Gentle cleansing, deep hydration, and zero inflammatory triggers are what will truly support that beautiful collagen remodeling process.
This careful, "less is more" approach is the secret to getting the results you paid for.
Ingredients to Embrace for Accelerated Recovery
Now, let's talk about what your skin actually needs. These are the ingredients that will soothe, hydrate, and support the natural regeneration process without adding any stress. Think of them as a cozy blanket for your healing skin.
Peptides: These little amino acid chains are the building blocks of essential proteins like collagen and elastin. When you apply a peptide serum, you're essentially sending signals to your skin cells to kick the repair process into high gear, helping to rebuild and firm the skin from the inside out.
Ceramides: I often describe ceramides as the grout between your skin cell "tiles." Microneedling temporarily messes with that grout. Using a ceramide-rich moisturizer helps patch up your skin's protective barrier, locking in crucial moisture and shielding it from irritants.
Growth Factors: These are the ultimate project managers for cell repair. Growth factors are proteins that orchestrate cellular communication, telling your cells to heal and regenerate. They are fantastic for speeding up recovery and amplifying the regenerative effects of your microneedling treatment.
There’s solid science backing this up. Microneedling can boost collagen and elastin production by up to 400%, but only if you give your skin the right tools to do the work. By being smart about what you apply, you’re not just avoiding problems—you’re actively ensuring a better, more satisfying result from your treatment.
Mastering Sun Protection After Microneedling
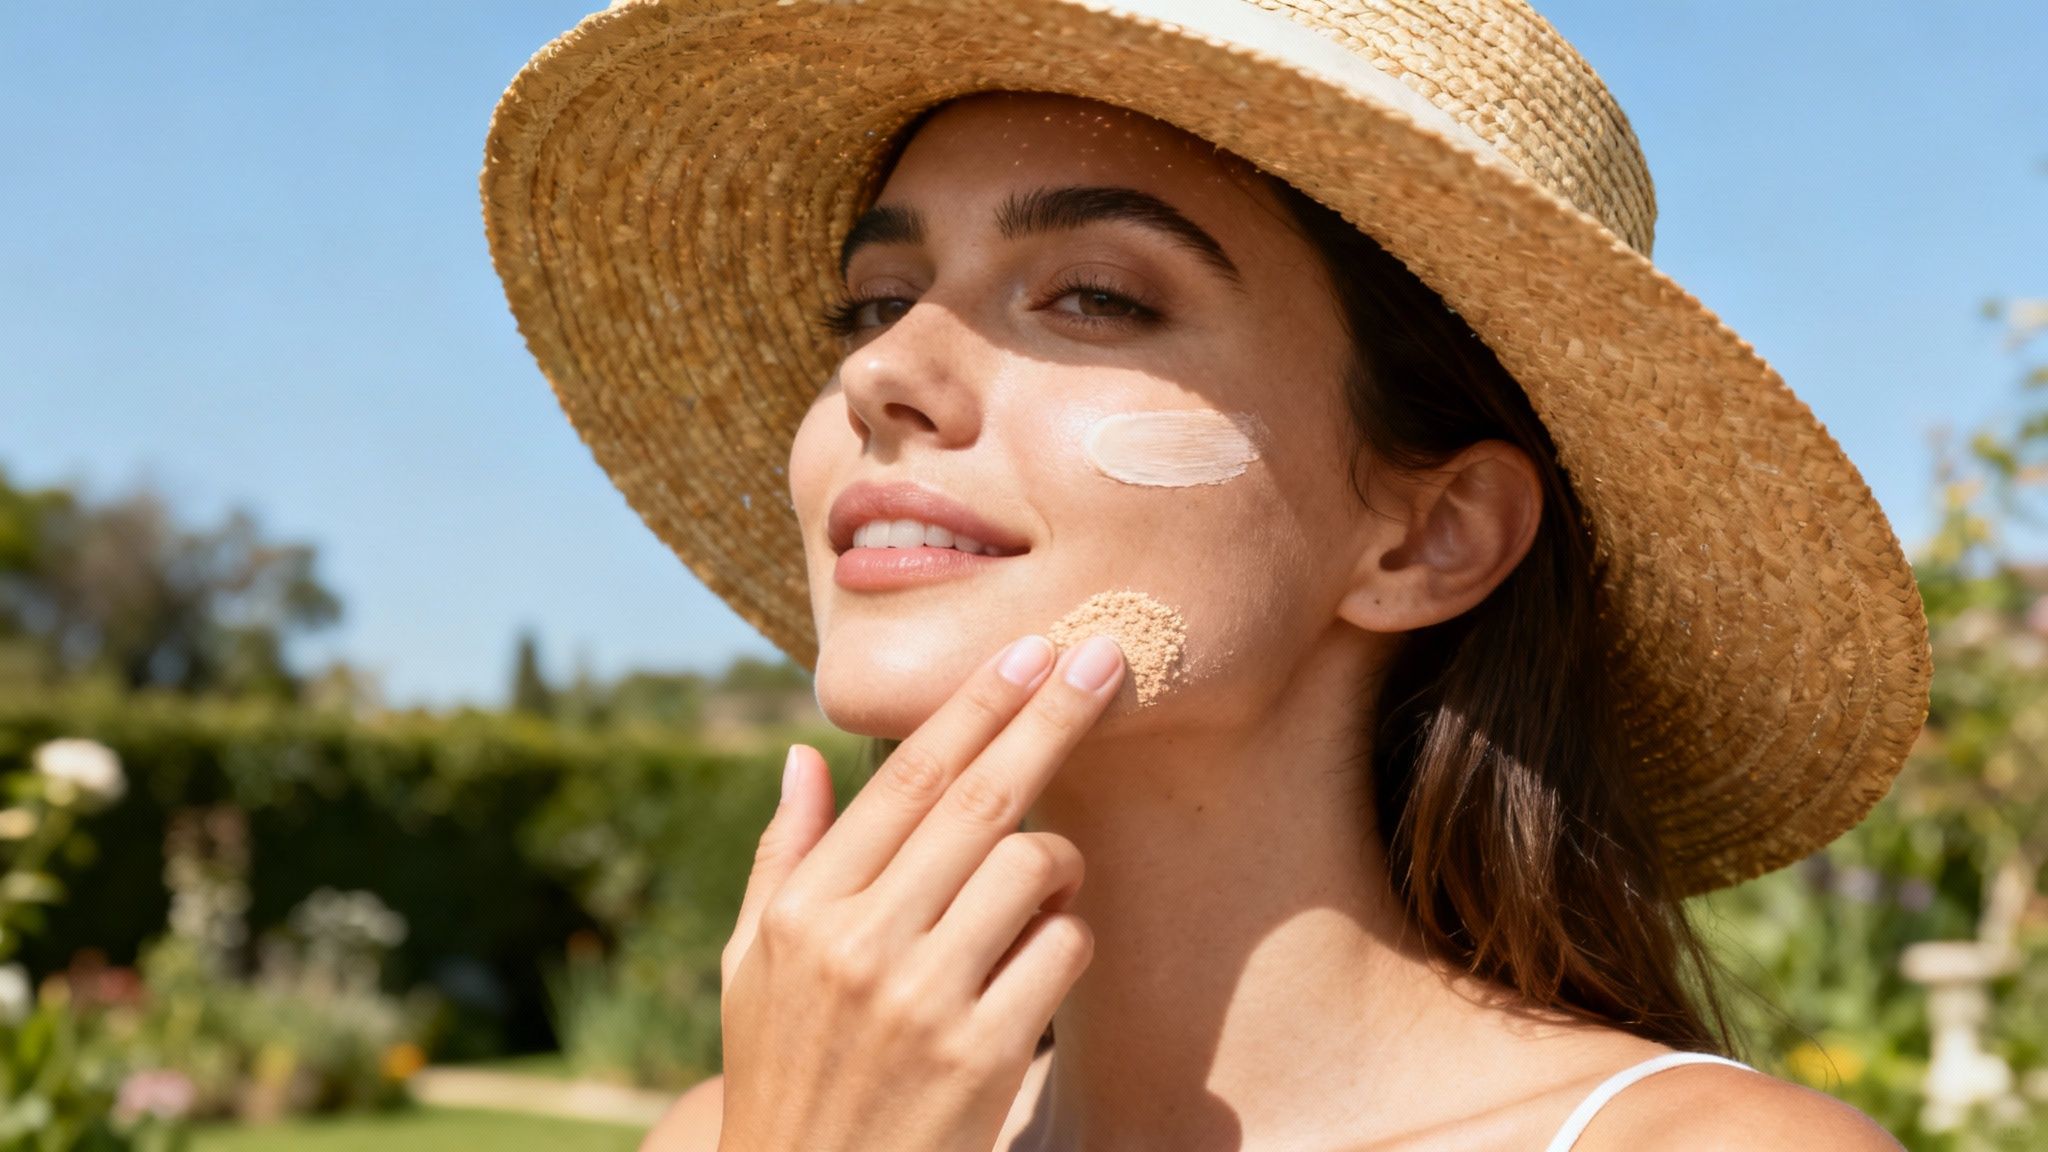
If there's one golden rule to follow after microneedling, it’s this: stay out of the sun. Your skin's natural barrier has been temporarily compromised, leaving it incredibly vulnerable to UV radiation.
Even a few minutes of unprotected sun exposure can trigger post-inflammatory hyperpigmentation (PIH), which looks like dark, stubborn spots. Essentially, you risk undoing all the hard work and investment you just made in your skin. Think of sun protection as the final, crucial step of your treatment.
Why Mineral Sunscreen Is Your New Best Friend
For the first week, you can't just grab any old sunscreen off the shelf. You need to be selective. A mineral-based sunscreen is the only way to go.
These are often called physical sunblocks because they work by creating a physical barrier on your skin's surface. The star ingredients here are zinc oxide and titanium dioxide. They sit on top of your skin and literally block or reflect UV rays away.
Chemical sunscreens, on the other hand, have to be absorbed into the skin to work. They convert UV rays into heat, a process that can easily irritate your sensitive, healing skin and clog those freshly created microchannels.
I always tell my clients to think of mineral sunscreen as a bodyguard for their skin. It’s a gentle but powerful shield that protects without causing trouble, which is exactly what your skin needs while it’s busy regenerating.
Mineral vs Chemical Sunscreen For Post-Procedure Skin
Choosing the right formula isn't just a suggestion; it's a critical part of a successful recovery. Here’s a quick breakdown of why mineral sunscreens are the clear winner for post-procedure skin.
| Feature | Mineral Sunscreen (Recommended) | Chemical Sunscreen (To Avoid) |
|---|---|---|
| Mechanism | Sits on top of the skin to physically block UV rays. | Absorbs into the skin and converts UV rays into heat. |
| Key Ingredients | Zinc Oxide, Titanium Dioxide. | Oxybenzone, Avobenzone, Octinoxate. |
| Activation Time | Works immediately upon application. | Requires about 20 minutes to become effective. |
| Suitability for Sensitive Skin | Excellent; less likely to cause irritation or allergic reactions. | Can cause stinging and irritation, especially on compromised skin. |
The takeaway is simple: mineral sunscreens offer immediate, gentle protection without the risk of irritation, making them the superior choice for your vulnerable skin.
Your Sun Protection Game Plan
How you apply sunscreen matters just as much as what you apply. Be gentle. Instead of rubbing it in, which creates friction, carefully pat the sunscreen onto your skin until it's evenly distributed. Make sure you use a generous amount and don't forget your neck and ears.
Reapplication is non-negotiable. You need to reapply your sunscreen at least every two hours. If you're sweating or happen to be outside, you’ll need to do it more often. And yes, you still need it indoors—UVA rays can penetrate windows.
Sunscreen is your first line of defense, but it shouldn't be your only one.
- A wide-brimmed hat is your best accessory when you have to go outside.
- Try to stay in the shade during peak sun hours (usually 10 a.m. to 4 p.m.).
- Pop on a pair of UV-protective sunglasses to protect the delicate skin around your eyes.
By treating sun protection as an absolute priority, you’re not just healing properly—you’re actively protecting your investment and ensuring your microneedling results are smooth, radiant, and beautiful.
Lifestyle Adjustments for Optimal Healing
What you put on your skin after microneedling is only half the battle. How you treat your body and what you do in your daily life plays a massive role in how well your skin recovers. A few simple tweaks can make all the difference, creating the perfect environment for your skin to heal and glow.
For the first 48-72 hours, you need to keep your body cool and calm. That means putting a pause on any activity that gets your blood pumping and makes you flushed. Think strenuous workouts, saunas, steam rooms, and even that hot yoga class you love. Sweat can seriously irritate your sensitive skin and, worse, it can introduce bacteria into those fresh micro-channels, leading to breakouts or even an infection.
It’s also crucial to stay out of the water. Swimming pools, oceans, lakes, and hot tubs are basically Petri dishes for bacteria. Exposing your vulnerable, healing skin just isn't worth the risk. A gentle walk is perfectly fine, but if it makes you break a serious sweat, it's best to wait a few days.
Supporting Your Skin from the Inside Out
Your diet and water intake are incredibly powerful tools for skin repair. Right now, your body is working overtime to build new collagen, and you can give it a major boost by fueling it correctly. Start by drinking plenty of water—hydrated skin cells are happy, functioning cells.
Eating a clean, antioxidant-rich diet will also help fight inflammation and support the whole repair process. For the week after your treatment, try loading up on foods like these:
- Brightly Colored Fruits and Veggies: Think berries, leafy greens, and bell peppers. They're packed with skin-loving vitamins.
- Healthy Fats: Avocados, nuts, and seeds contain essential fatty acids that are amazing for strengthening your skin's barrier.
- Lean Protein: Things like fish and chicken provide the amino acid building blocks your skin needs for strong, new collagen.
For more ideas on boosting your skin's health from within, these 5 Powerful Holistic Tips for Radiant Skin are a great addition to any routine.
Here's a pro tip that's easy to forget but makes a huge difference: change your pillowcase the night of your treatment. A fresh, clean surface prevents bacteria, oils, and old product residue from getting anywhere near your healing skin.
These lifestyle adjustments are a non-negotiable part of your aftercare. Some people also find that adding other gentle, non-invasive treatments between their microneedling sessions helps amplify their results. If you're curious about complementary therapies, this guide to LED facials breaks down how light therapy can further support skin rejuvenation. Taking a holistic approach ensures you’re giving your skin absolutely everything it needs to regenerate beautifully.
What to Expect in the Weeks Following Your Treatment
Once the initial redness and tenderness have calmed down, the real work begins deep within your skin. This is what we call the collagen remodeling phase, and it's where the magic really happens. Your skin is busy rebuilding its foundation, so patience is absolutely key here.
You won’t wake up to perfect skin overnight. That coveted glow, smoother texture, and visible firmness really start to show up around the four to six-week mark post-treatment. It simply takes time for your body to generate and organize all those new, healthy collagen fibers.
Reintroducing Your Regular Skincare Routine
After about a week, your skin's protective barrier should be back in business. Now you can start thinking about reintroducing your usual products, but the golden rule is to go slow. Add things back one at a time to make sure your skin is happy.
- Week 2: This is a good time to bring back a gentle vitamin C serum for your morning routine. It's a great antioxidant that will help protect your healing skin.
- Weeks 3-4: If your skin feels totally back to normal, you can consider re-adding mild exfoliants or your retinoid. Start with just a couple of nights a week and watch closely. If you see any signs of irritation, pull back immediately.
This slow-and-steady approach is the best way to avoid overwhelming your skin while it’s still working hard on that deeper healing process.
Microneedling's popularity isn't just hype; it's backed by incredible results. The global market is expected to hit around US$807 million by 2025. A huge chunk of that growth is right here in North America, where people are looking for anti-aging treatments that actually work. With sessions running anywhere from $200 to $800, a smart aftercare plan is the best way to protect that investment. You can discover more insights about the microneedling market if you're curious about its growth.
Maintaining Your Long-Term Glow
Once you start seeing those beautiful results, you'll want to keep them. The single most important thing you can do? Sun protection. Every. Single. Day. A broad-spectrum SPF is non-negotiable for protecting all that new collagen from sun damage.
To really appreciate what’s happening, it helps to understand the importance of cellular health, which is exactly what microneedling kickstarts. Backing up your treatment with a healthy lifestyle and a solid skincare routine is the secret to making your results last. Knowing what to do after microneedling long-term sets you up for radiant, healthy skin for months to come.
Navigating Your Microneedling Aftercare: Your Questions Answered
Even with the best plan, you're bound to have questions as your skin starts to heal. That's completely normal. Feeling confident in your aftercare is all about getting clear answers, so let's walk through some of the most common concerns I hear from clients all the time.
When Can I Wear Makeup Again After Microneedling?
I know it’s tempting to cover up the post-treatment redness, but your skin needs a breather. My hard-and-fast rule is to wait at least 24 to 48 hours before even thinking about makeup.
Those tiny micro-channels from the treatment are still open, and applying cosmetics too soon is just asking for clogged pores, breakouts, or some serious irritation. Think of it as giving your skin a clean slate to heal properly.
When you do feel ready to apply makeup again, start with spotlessly clean brushes and sponges. This is non-negotiable! You don’t want to introduce any bacteria to your sensitive, healing skin. I often recommend a mineral-based makeup for the first few days back, as it tends to be gentler and less likely to cause a reaction than many traditional formulas.
What Should I Do About Peeling Skin?
Don’t panic if you start to see some light flaking around day three or four. This is actually a great sign! It means your skin is in full-on regeneration mode, shedding old cells to make way for the new.
The absolute worst thing you can do is pick, peel, or scrub at the flaky skin. I can't stress this enough. It will only disrupt the healing process and could even lead to irritation or scarring.
Instead of fighting it, lean into hydration. Gently pat on your hyaluronic acid serum or a simple, nourishing moisturizer. This will help soften the flakes, keep your skin comfortable, and allow the old layer to shed naturally. Be patient—glowing, fresh skin is right underneath.
How Long Should I Wait Between Microneedling Sessions?
It's easy to get excited and want to book your next appointment right away, but you have to give your skin time to do its work. Generally, you’ll want to wait four to six weeks between sessions.
This window isn't arbitrary; it aligns with your skin's natural cycle of healing and collagen production. Trying to rush it won't get you better results faster. In fact, it could do the opposite and lead to over-sensitized skin. Your skincare professional will help you map out the perfect schedule based on your skin's unique needs and the results you're aiming for.
At Face of Jules, we don't believe in one-size-fits-all. We'll build a personalized aftercare plan with you to make sure you get incredible results from every single treatment. Book a consultation with us today and let's start your journey to clear, healthy skin.